Thank you so much for choosing Wilde Presets and supporting our small business! We hope you love our presets as much as we loved creating them for you! Please take a look below for our step by step video tutorial, adjustment guides, and more.

Have questions? Feel free to contact us! We're incredibly responsive and happy to help. Just fill out our contact form and we'll get back to you ASAP. Happy editing! 

Are you ready to get started?

First, if you haven't already, you'll download the free Lightroom mobile app. All of our preset collections are designed for the FREE Lightroom mobile app and the Lightroom desktop program. To download the free Lightroom mobile app, type in "Lightroom" in the app store. You may see a few different options. What you're looking for is "Adobe Lightroom Photo Editor", which is the FREE, official Lightroom mobile app.

Download the Free Lightroom Mobile App for iPhone HERE.

Download The Free Lightroom Mobile App for Android HERE.

Please note: The Lightroom mobile app on mobile is completely free to use our presets. You will only need an Adobe subscription if you wish to edit your photos using the Lightroom Desktop program on your computer.

Mobile Tutorial / Step By Step Video

Watch our step by step video tutorial below to learn how to download & import the presets in the free Lightroom mobile app.

Please refer to our step by step video tutorial below.

Please note, If you're using the gmail app, the first few steps in the video tutorial above will be slightly different for you. Once you click on a dng file, you should see a screen that says "more". Click more and scroll down on the pop up prompt. You should see "Save to Files". Click that and repeat for remaining dng files.

Tip: If you're using Chrome, the google search app, or an app browser is giving you trouble (such as Safari browser through the gmail app), I recommend opening the download page directly in the safari browser app vs. Chrome or the browser through an app.

Please refer to our step by step video tutorial below.

Please note, we're using an iPhone in the video tutorial above. If you're using Android, the only difference is the mobile dng files will automatically download to your phone when you click them.

Once downloaded, you'll open Lightroom and import from your photo gallery vs. "from files". From there, you'll follow the remaining steps in the video tutorial.

Desktop Tutorials

How to download & import the presets in the Lightroom desktop program.

The desktop files are located in the zip folder on your download page. Download the zip file to your computer and once downloaded, be sure to unzip the folder! To unzip the folder on Mac, double click the zip file and it will automatically unzip.

If you’re using a newer version of Lightroom, you’ll import the xmp files. To import the files, open up a photo in Lightroom, visit the “develop” module (where you edit your photos), and then click the + symbol in the presets panel to import them.

For older versions of Lightroom, you’ll import the lrtemplate files using the below steps:

1. Go to “Lightroom” in your main menu and click “Preferences”

2. Click on “Show All Other Lightroom Presets” in the “Preferences“ Menu

3. Paste the preset folder containing the .Irtemplate files into Lightroom > Develop Presets & restart Lightroom.

The desktop files are located in the zip folder on your download page. Download the zip file to your computer and once downloaded, be sure to unzip the folder! To unzip the folder on a Windows computer, right click on the zip file and click "extract".

If you’re using a newer version of Lightroom, you’ll import the xmp files. To import the files, open up a photo in Lightroom, visit the “develop” module (where you edit your photos), and then click the + symbol in the presets panel to import them.

For older versions of Lightroom, you’ll import the lrtemplate files using the below steps:

1. Go to “Lightroom” in your main menu and click “Preferences”

2. Click on “Show All Other Lightroom Presets” in the “Preferences“ Menu

3. Paste the preset folder containing the .Irtemplate files into Lightroom > Develop Presets & restart Lightroom.

Please note, we make our presets for both, JPG and RAW shooters. Because of this, we slightly adjust temperature to help give those shooting in JPG (photographers and non-photographers alike), more of a “base”.

If you are editing in RAW, you’ll want to toggle the preset’s white balance from “custom” to “as shot” so that it’s not predetermining your temperature setting — and to avoid having to do that every time, we recommend clicking “update current settings” on the preset once you make the change so that it stays that way.

Adjustment Guides

Get the most out of our presets with these quick and easy adjustment guides. We cover skin tones, exposure, and much more.

These presets are our humble works of art. Each preset is carefully crafted with love and dedication by a growing team of professional photographers and skilled retouchers to look great with a wide variety of photos.

However, please keep in mind that results may vary depending on the lighting, tones, and settings of the original photos as each photo carries its own unique settings. That said, while we do our best to ensure that our presets work beautifully with a wide variety of images (and they do!), it’s impossible to predetermine the perfect settings for every single photo — especially if the lighting in your photo is exceptionally dark, light, or warm.

We recommend taking a look at our Adjustment Guides below which cover simple adjustments that you can (and should) make when using presets to make your photo edits even stronger.

This is such a great question. However, a hard one to answer as so many factors can be at play (e.g location, weather, time of day). What we can recommend is that you shoot slightly under exposed, never over exposed. You can always add a bit more exposure in post processing, but eliminating overexposed highlights can be difficult, and even impossible in most cases.

All of our preset collections include up to 15 presets. We recommend that you download and sample all of the presets within the collection on each photo. In most cases, subtle variations can make the biggest difference! Each preset is slightly different but goes well with one another so you can find the right preset for the photo you're editing, maintain the same style, and create a cohesive theme of photos.

Here we're covering 3 quick and easy preset adjustments that you can (and should) make to our presets in Lightroom to make your photos even stronger! Let's begin :)

1. Exposure

If the photo is too dark or too light, the exposure slider will let you add and subtract light to and from the photo. Increasing the exposure slider somewhere between +0.5 to +0.35 typically works perfectly, but it all depends on the lighting in the image you're editing!

👉🏼 If you're using the mobile app, click the "light" tab and you'll see the "exposure" slider.

Tip: It's important to shoot slightly under-exposed, because over-exposed images are much more difficult to fix in post processing!

2. Temperature & Tint

If the lighting in your photo is too warm or too cool, you may need to make adjustments to the "Temperature" and "Tint" sliders. These sliders can play a VERY important role in the outcome of your photo edit (especially if you edit in RAW). The temperature slider will add more warmth or cool it down, whereas the tint slider will add more of a pink or green tint. We recommend making subtle adjustments to these sliders until you find the happy medium for your photo.

Tip For RAW Editing:Please note, we make our presets for both, JPG and RAW shooters. Because of this, we slightly adjust temperature to help give those shooting in JPG (photographers and non-photographers alike), more of a “base”.If you are editing in RAW, you’ll want to toggle the preset’s white balance from “custom” to “as shot” so that it’s not predetermining your temperature setting.To avoid having to do that every time, we recommend clicking “update current settings” on the preset once you make the change so that it stays that way.This is a very important step and will make a BIG difference in how the presets look on your photos.

👉🏼 If you're using the mobile app, click the "color" tab and you'll see the "temp" and "tint" slider.

3. Orange / Skin Tone

Our presets are created for all skin tones. In the rare event that the presets sightly alter your skin tone, you'll want to adjust the orange bar. The orange bar is where skin tones fall. We like to fine-tune skin tones for every image. You may find that the presets work perfectly, or you may find that the skin is slightly too dark, too light, or too orange.

If adjustments need to be made to the skin tone, we highly recommend adjusting the orange luminance and the orange saturation sliders ever so slightly!

Orange Luminance: The lower (-) the orange luminance, the darker and more tan skin will look. The higher (+) the orange luminance, the lighter and brighter skin will look.

Orange Saturation: If the skin tone is too orange, you may want to lower (-) the orange saturation. Be careful with the orange saturation slider! If you slide too low, you’ll lose all skin tone, and if you slide too high, skin will look too orange!

👉🏼 To get to the orange bars on the free Lightroom mobile app, you'll click the Color tab, which is located in the bottom menu where you see the crop, light, presets, etc tabs. Once you click color, you will click the Color Wheel Icon next to Mix. From there, you'll click the Orange Circle.

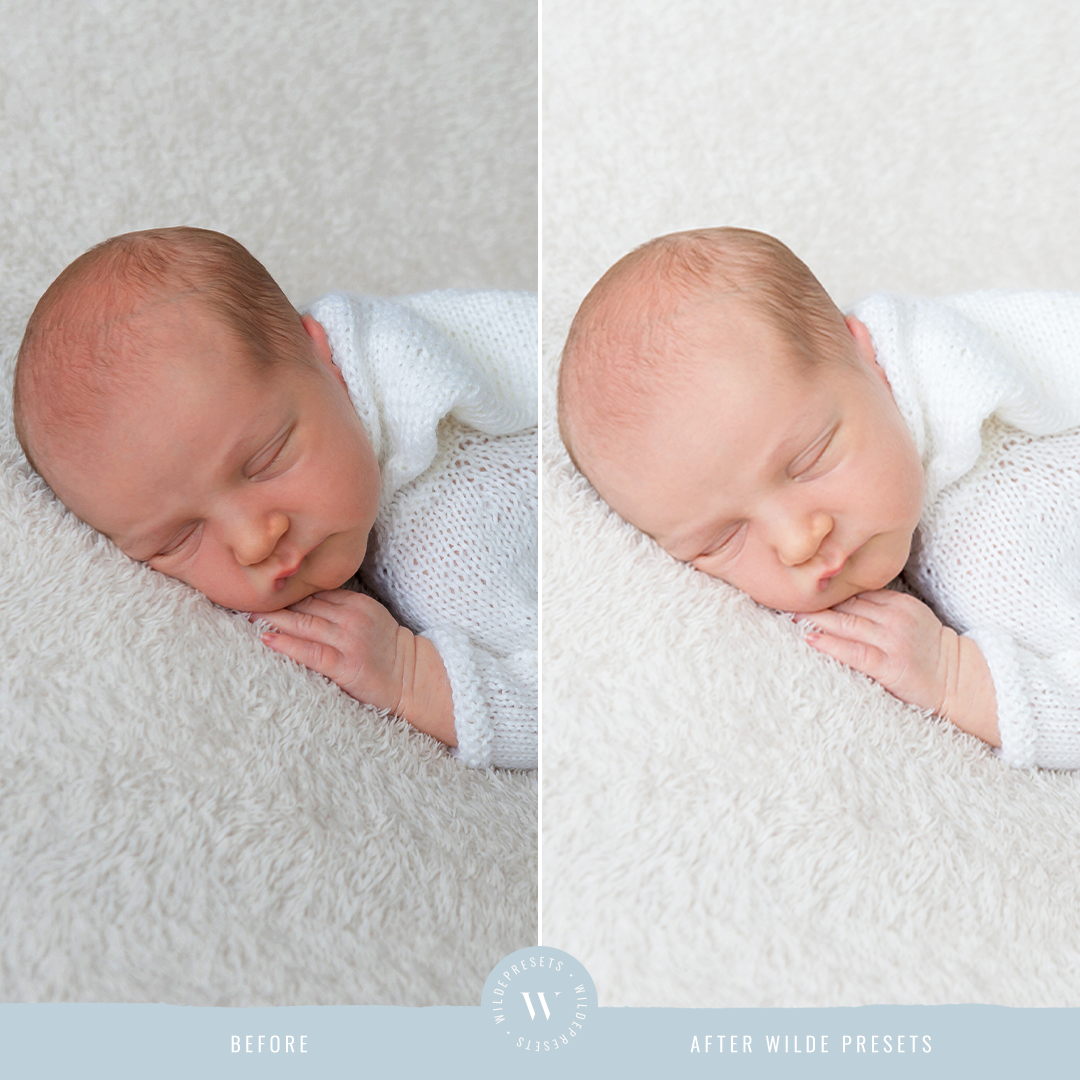
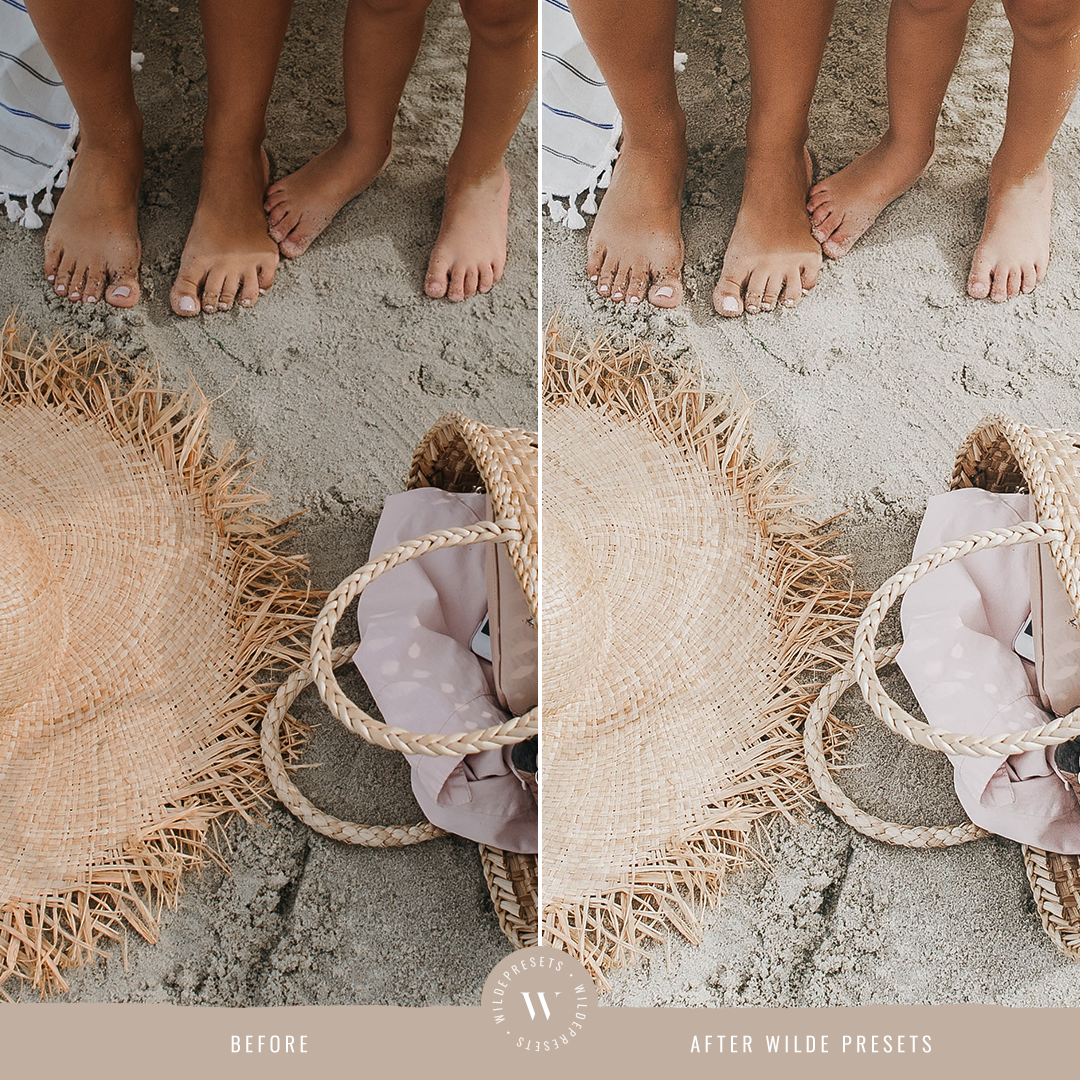
Our presets are created for all skin tones. Before launching a new preset collection, each preset undergoes testing with dozens of different skin tones to deliver beautiful results. That said, you may find that the presets work perfectly, or you may find that the skin is slightly too dark, too light, or too orange.

In the rare event that the presets sightly alter your skin tone, you'll want to adjust the orange bar. The orange bar is where skin tones fall. If adjustments need to be made to the skin tone, we highly recommend adjusting the orange luminance and the orange saturation sliders ever so slightly!

👉🏼 To get to the orange bar on the free Lightroom mobile app, you'll click the Color tab, which is located in the bottom menu where you see the crop, light, presets, etc tabs. Once you click color, you will click the Color Wheel Icon next to Mix. From there, you'll click the Orange Circle.

If the presets are adding too much exposure to your photos, it means you are editing photos that already have a fair amount of exposure. To fix this, all you need to do is decrease the exposure. If you find yourself shooting around this same exposure for most of your photos, we recommend saving over the preset so the exposure of the presets work better for your particular photos.

If the presets aren’t adding enough exposure to your photos, it means you are editing photos that are fairly dark or have an exposure right around the exposure of the presets. To fix this, all you need to do is increase the exposure. If you find yourself shooting around this same exposure for most of your photos, we recommend saving over the preset so the exposure of the presets work better for your particular photos.

Troubleshooting

Having trouble? Let's troubleshoot some tech related questions.

If the "Create Preset" button is grayed out and you're unable to click it, all you need to do is restart your phone and that should resolve the issue you're experiencing.

If you're receiving this message it's because Lightroom has already auto imported the dng photo files you downloaded to your phone. No worries! All you need to do is click "all photos" on the main Lightroom screen and then scroll down until you find them. From there, you can follow the remaining steps in the video tutorial.

Have questions?

Feel free to contact us! We're incredibly responsive and happy to help. Just fill out our contact form and we'll get back to you ASAP.